Adding a Live Chat Widget to Your Filament Dashboard
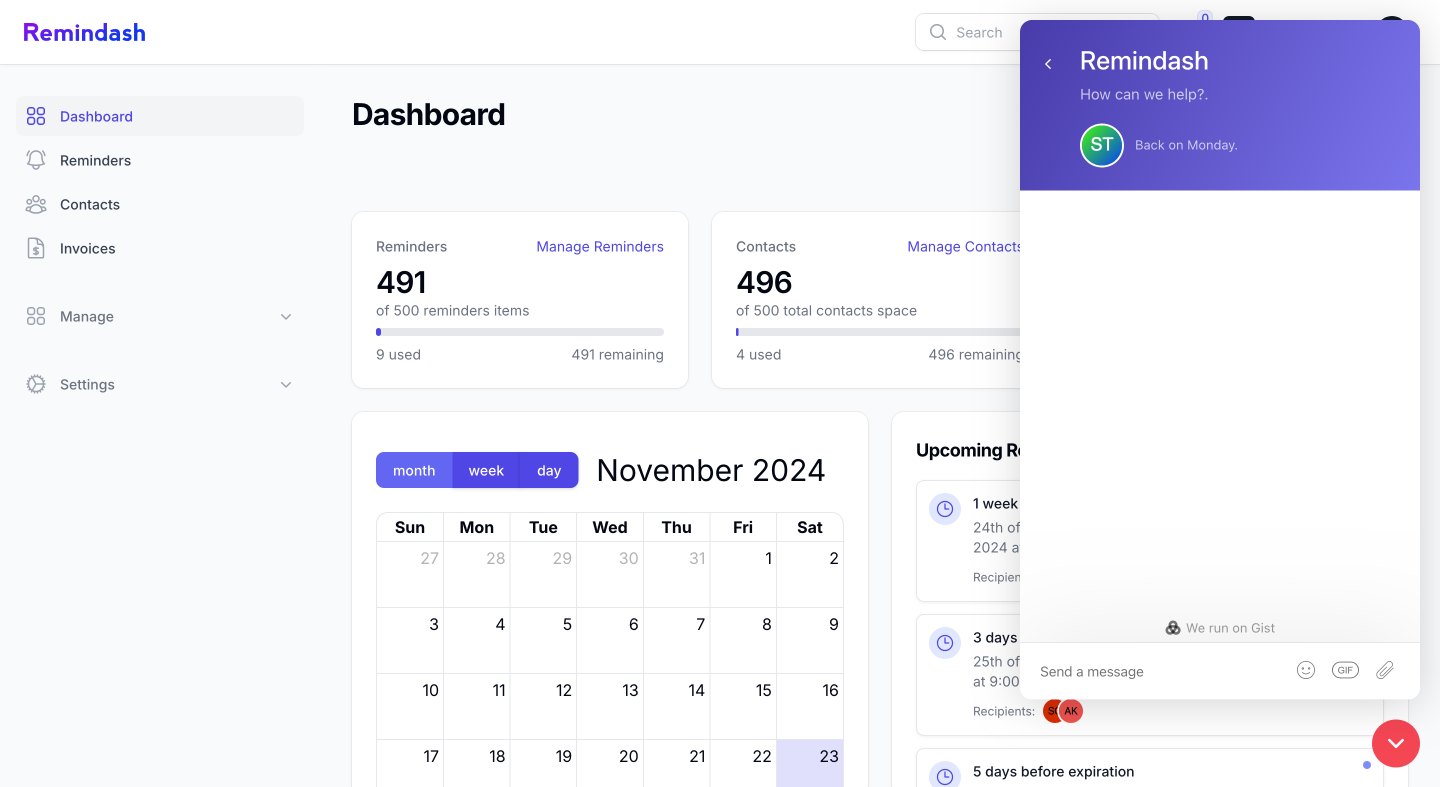
While building Remindash (remindash.com), I faced a common challenge that many SaaS developers encounter: providing in-app support for users. Remindash is a platform designed to centralize and manage reminders for teams, clients, and external partners through SMS, WhatsApp, and other channels. With a growing user base, it became clear that offering real-time support directly within the app was non-negotiable.
After some research, I decided to integrate a live chat widget into my dashboard using Gist LiveChat. In this blog post, I’ll share the journey and the step-by-step implementation process, including how I passed user information (name, email, etc.) to the live chat widget.
Why Gist LiveChat?
I chose Gist LiveChat because it offers a sleek interface, seamless integration, and powerful features for real-time user engagement. It also supports personalization by allowing us to pass user data to the widget, making it easy to identify who is reaching out.
The Challenge
Since Remindash is built with Filament, I needed to figure out how to:
- Add external JavaScript assets to the Filament dashboard.
- Dynamically pass user data (like name and email) to the Gist widget.
- Ensure the widget only loads in a production environment and for authenticated users.
To achieve this, I utilized Filament’s FilamentAsset facade and middleware.
Step 1: Setting Up the Gist Widget Script
First, I wrote a custom JavaScript file (gist-livechat.js) that initializes the Gist LiveChat widget. This script connects to Gist, tracks page views, and identifies logged-in users by sending their details.
Here’s the code for gist-livechat.js:
(function(d, h, w) {
    var gist = w.gist = w.gist || [];
    gist.methods = ['trackPageView', 'identify', 'track', 'setAppId'];
    gist.factory = function(t) {
        return function() {
            var e = Array.prototype.slice.call(arguments);
            e.unshift(t);
            gist.push(e);
            return gist;
        };
    };
    for (var i = 0; i < gist.methods.length; i++) {
        var c = gist.methods[i];
        gist[c] = gist.factory(c);
    }
    var s = d.createElement('script');
    s.src = "https://widget.getgist.com";
    s.async = true;
    var e = d.getElementsByTagName(h)[0];
    e.appendChild(s);
    s.addEventListener('load', function(e) {}, false);
    gist.setAppId("your-app-id-here");
    gist.trackPageView();
})(document, 'head', window);

// Pass user data to Gist LiveChat
gist.identify(String(window.filamentData.user.id), {
    email: window.filamentData.user.email,
    name: window.filamentData.user.name,
    subdomain: "app"
});
Step 2: Creating Middleware to Register the Script
Rather than directly modifying the AppServiceProvider, I opted to create a middleware. This middleware:
- Ensures the widget only loads in the production environment.
- Checks if the user is authenticated.
- Registers the JavaScript file and dynamically passes user data using FilamentAsset.
Here’s the middleware class:
<?php

namespace App\Http\Middleware;

use Closure;
use Filament\Support\Assets\Js;
use Filament\Support\Facades\FilamentAsset;

class RegisterGistAssets
{
    public function handle($request, Closure $next)
    {
        if (app()->environment('production') && auth()->check()) {
            // Pass user data to Filament's asset system
            FilamentAsset::registerScriptData([
                'user' => [
                    'id' => strval(auth()->user()->id),
                    'email' => strval(auth()->user()->email),
                    'name' => strval(auth()->user()->name),
                ],
            ]);

            // Register the custom JavaScript file
            FilamentAsset::register([
                Js::make('gist-livechat-script', asset('js/gist-livechat.js')),
            ]);
        }

        return $next($request);
    }
}
Step 3: Adding the Middleware to Filament
Next, I needed to include the middleware in my Filament plugin provider to ensure it runs on every dashboard page. Here’s how I added it:
->middleware([
    EncryptCookies::class,
    AddQueuedCookiesToResponse::class,
    StartSession::class,
    AuthenticateSession::class,
    ShareErrorsFromSession::class,
    VerifyCsrfToken::class,
    SubstituteBindings::class,
    DisableBladeIconComponents::class,
    DispatchServingFilamentEvent::class,
    RegisterGistAssets::class, // Add the middleware here
])
Step 4: Deploying and Testing
Once the middleware and script were in place, I deployed the changes to my production environment. The live chat widget appeared seamlessly on the dashboard, and it automatically received the authenticated user’s details (ID, email, name, etc.).
If you’re building a Filament-based app and need to integrate an external live chat widget, I hope this guide helps you get started. As always, feel free to reach out if you have questions or need assistance!
Related Articles that May Be to Your Interest
Filament: Invite Only Registration via Email Invitations
Learn how to implement an invite-only registration feature using Filament, ensuring exclusive access to your platform and enhancing user engagement through personalized invitations and controlled membership enrollment.
Filament v4 is Coming: Here are Somethings You Need to Know
Filament v4 is coming! Discover its powerful new features, performance boosts, and enhanced flexibility to take your Laravel apps to the next level. 🚀
New Features in TweakPHP 0.7.0 Release
Discover TweakPHP 0.7.0’s custom loaders and improved cross-platform support, boosting PHP development efficiency and flexibility.

